Source code available on GitHub here – https://github.com/aledthom/wifi_enabled_keyboard_injection
Recently I’ve been working on some new devices to remotely access computers and mobile devices via their USB connections. The technique known as ‘keyboard injection’ has existed for a long time, it essentially exploits the fact that computers are set up to accept any device plugged in to USB announcing itself as a ‘human interface device’ (keyboard, mouse etc.) without any confirmation from the user. This is useful because a user can plug in their keyboards and mice and just use them without having to do any set up, but it can be exploited by any device which can impersonate one of these HID devices as the computer will accept it’s inputs (keystrokes for example) as if it is a valid user typing on a keyboard.
This allows us to access anything a desktop user can access, we can use shortcut keys to open a command prompt, type commands, download files to the machine, run payloads, copy files to our USB, among many other actions.
Commercially available devices already exist for this purpose, the most well known being Hak5’s rubber ducky, this was originally a simple keyboard injection tool programmed in a basic scripting language but has since evolved to run more complex scripts and into a whole line of products allowing injection over other methods like ethernet, keylogging, and exfiltration of data through through the keyboard light indicators (capslock, numlock etc.).
These more advanced devices can run into the hundreds of £/$, I wanted to build something as capable but on a much smaller budget.
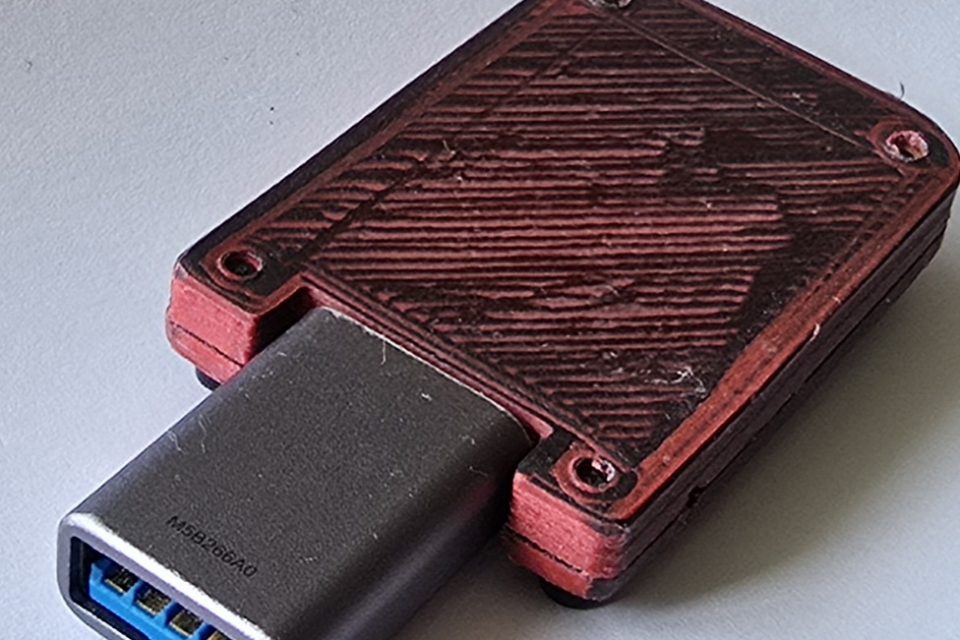
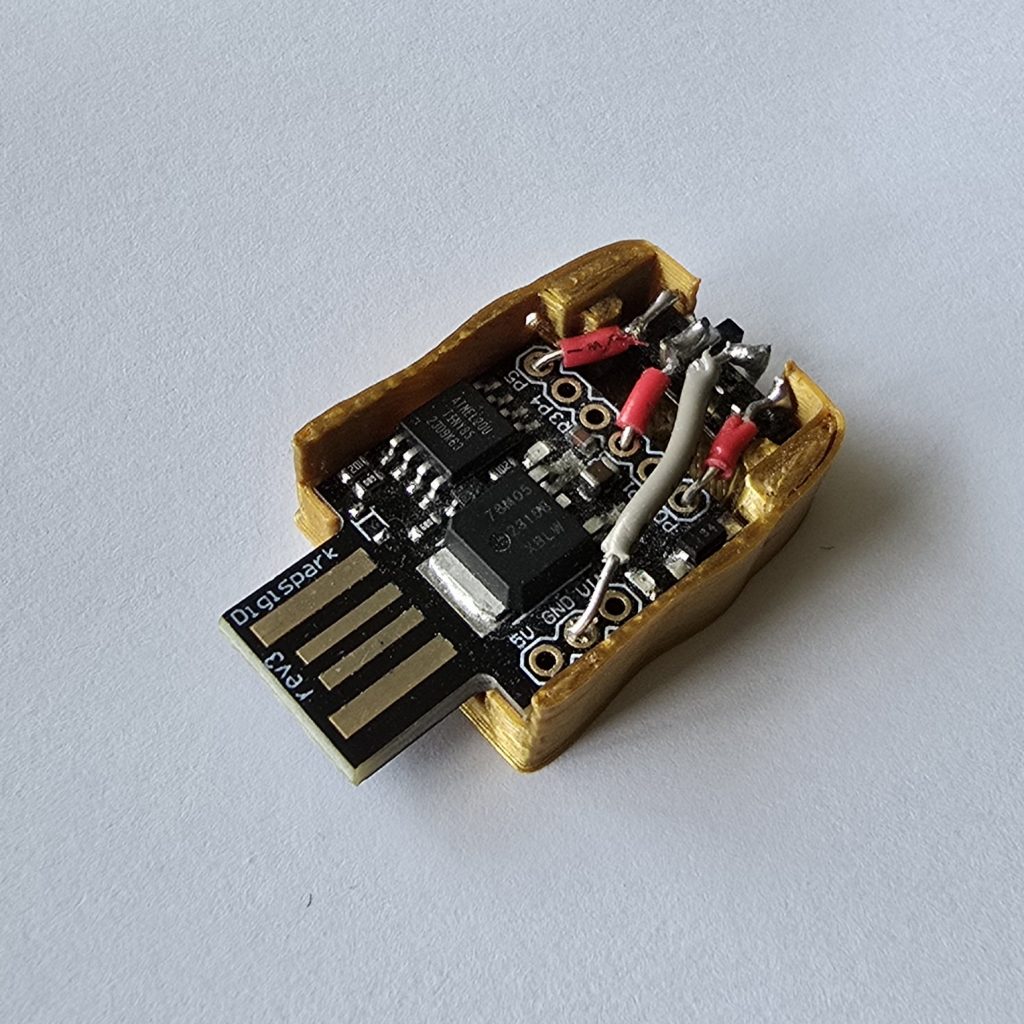
This first device is based on a DigiStump board, which has onboard USB and a atTiny85 processor. It has limited flash memory space (8kB), and of the 6 input pins available 2 are unavailable when using USB, with a 3 position slider switch we can build a very small device which can run 3 different preloaded keyboard scripts. Not bad considering these boards can be picked up for around £2-3, and the switch costs pennies. The limited memory space does limit what it’s capable of but it’s plenty for just three scripts, and we can have one for windows targets, one for linux, and one for another OS, plug it in and forget it as it starts typing at lightning speed.
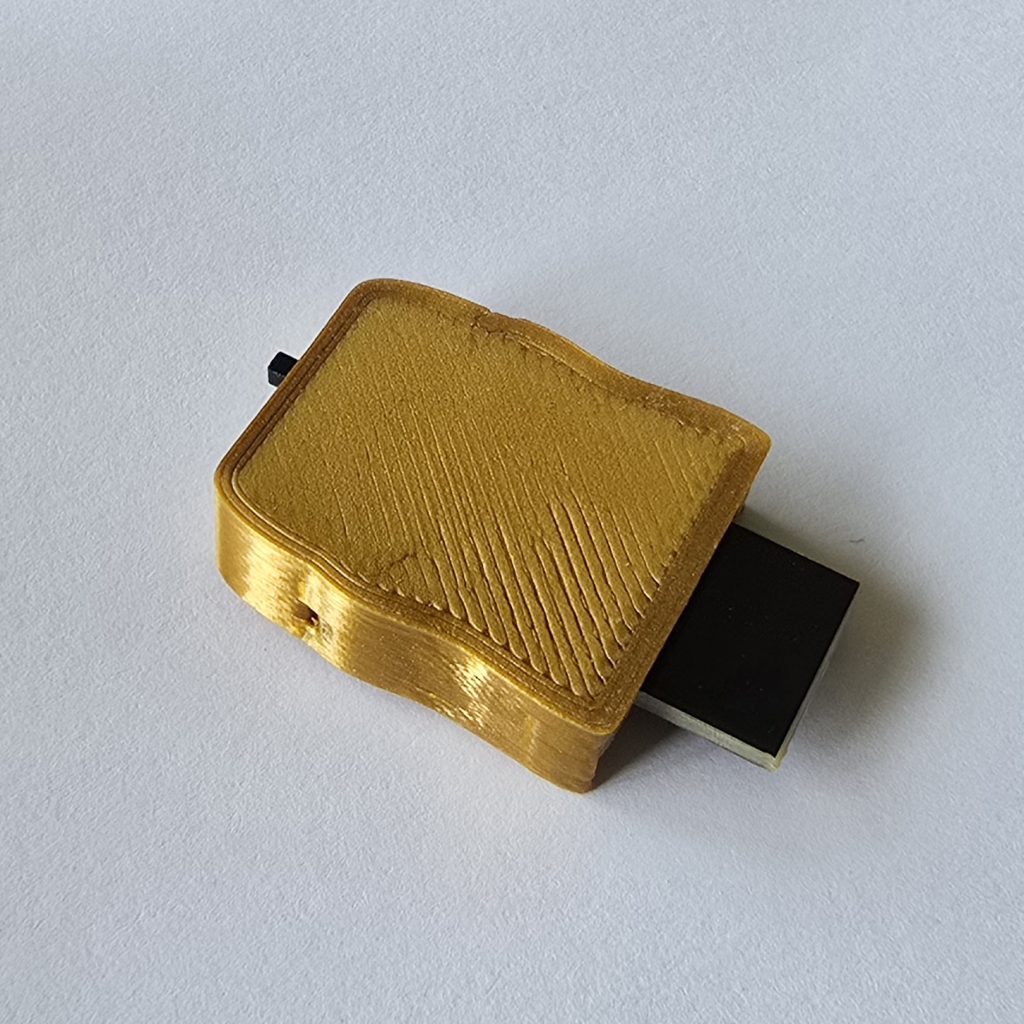
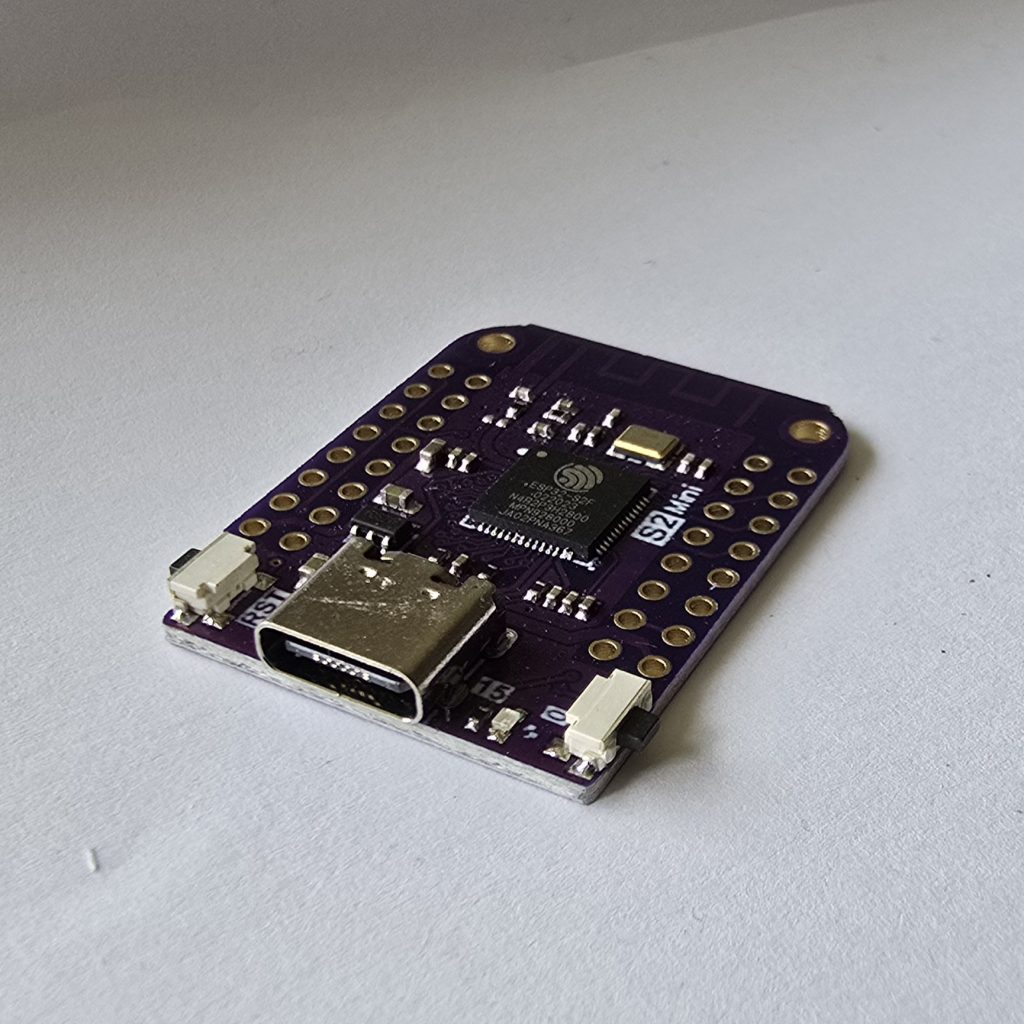
This second device uses a much more capable (but still affordable) board – using an ESP32 chip, developement boards using these chips are available for just a few £ and need no external components added to work. While they are a little larger than the digispark, you get a lot more features included, including on board WiFi, 4MB of flash memory, and a quicker processor with a lot more available inputs. The board I use here is a Wemos S2 mini, it has USB-C which works with the ESP libraries but also doubles as USB-serial for programming, a WiFi antenna on the pcb, an extra 2MB of ram, and tons of available inputs.
The larger storage allows us to store many more scripts on the board, and the WiFi capability allows us to connect remotely to the device, either by having it connect to an existing WiFi network or by having it set up it’s own WiFi access point which we can connect to.
The extra memory means we can run much more complex scripts. While this device will not as yet match the complexity you can achieve with the latest ‘rubber ducky’, it is fully compatible with scripts written in duckyscript V1, and adds some extra functionality to match that of the flipper zero like holding keys down, control the typing speed. In addition to functioning as a keyboard, we can also code in mouse movements and clicks, and randomisation of movements/keypresses.
source code and instructions are on my github.
Some extra features the ESP gives us access to:
The built in WiFi allows us to run a basic webserver to control it remotely once it’s in place.
I hacked together a quick web interface to manage the scripts stored on the device-
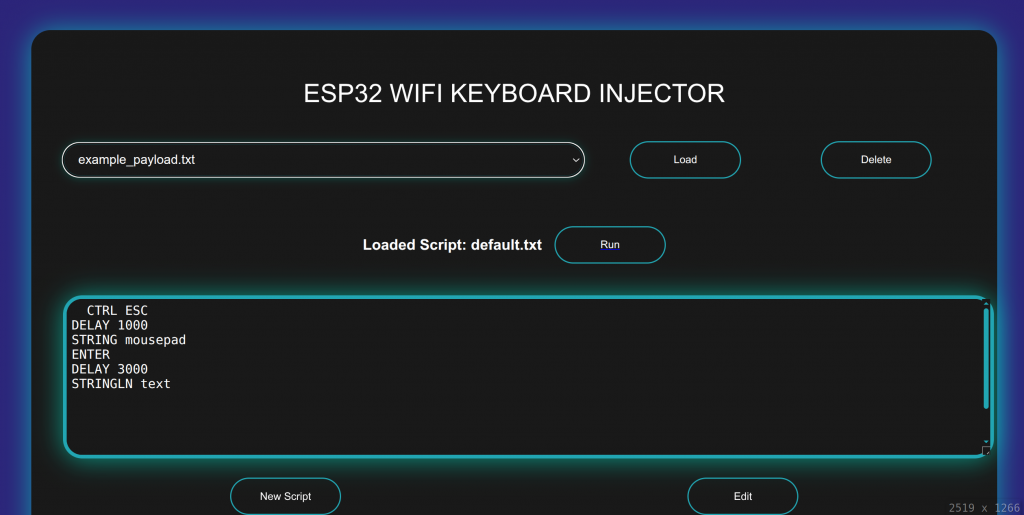
From the interface we can choose a script, load it and see a preview of it, delete any scripts we dont need, and execute the script on the target.
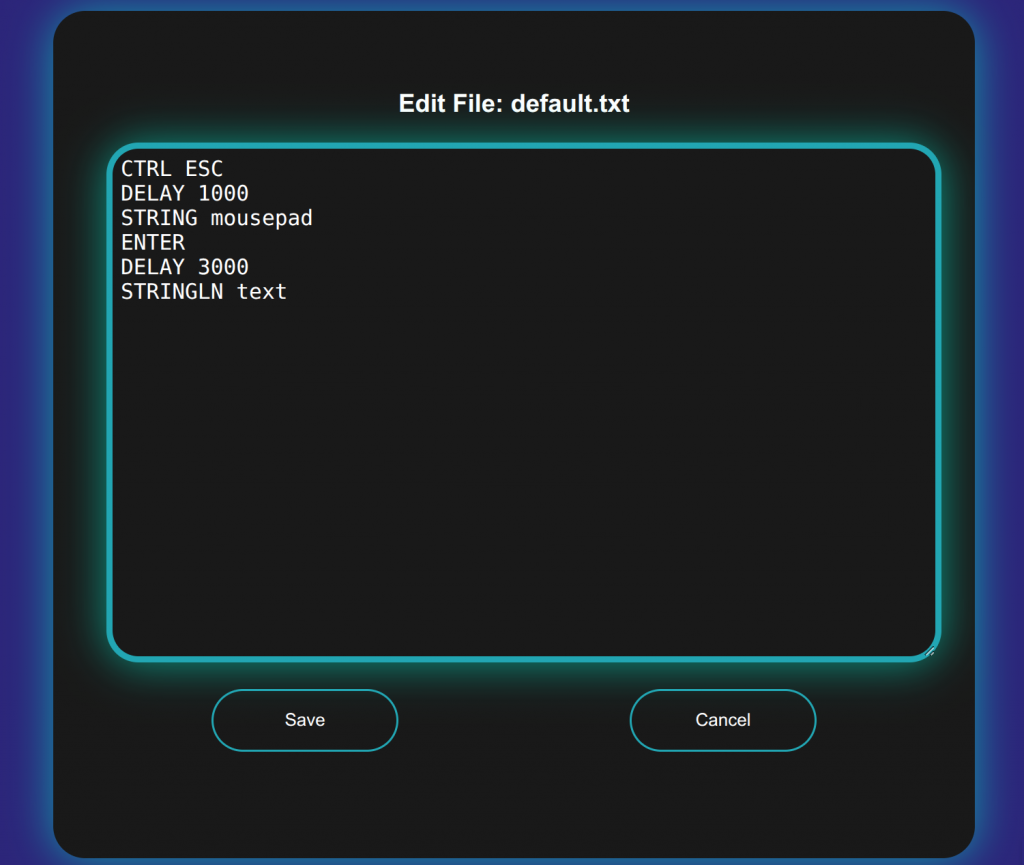
There is also an option to edit the scripts on the device – sometimes we might need to change values used on the fly or use template scripts so here we can enter the details/IPs/URLs etc that we plan on using before running the commands on the victim computer. We can also create a new file, allowing us to add new scripts on the fly by typing them in directly or copy and pasting them into the web interface.
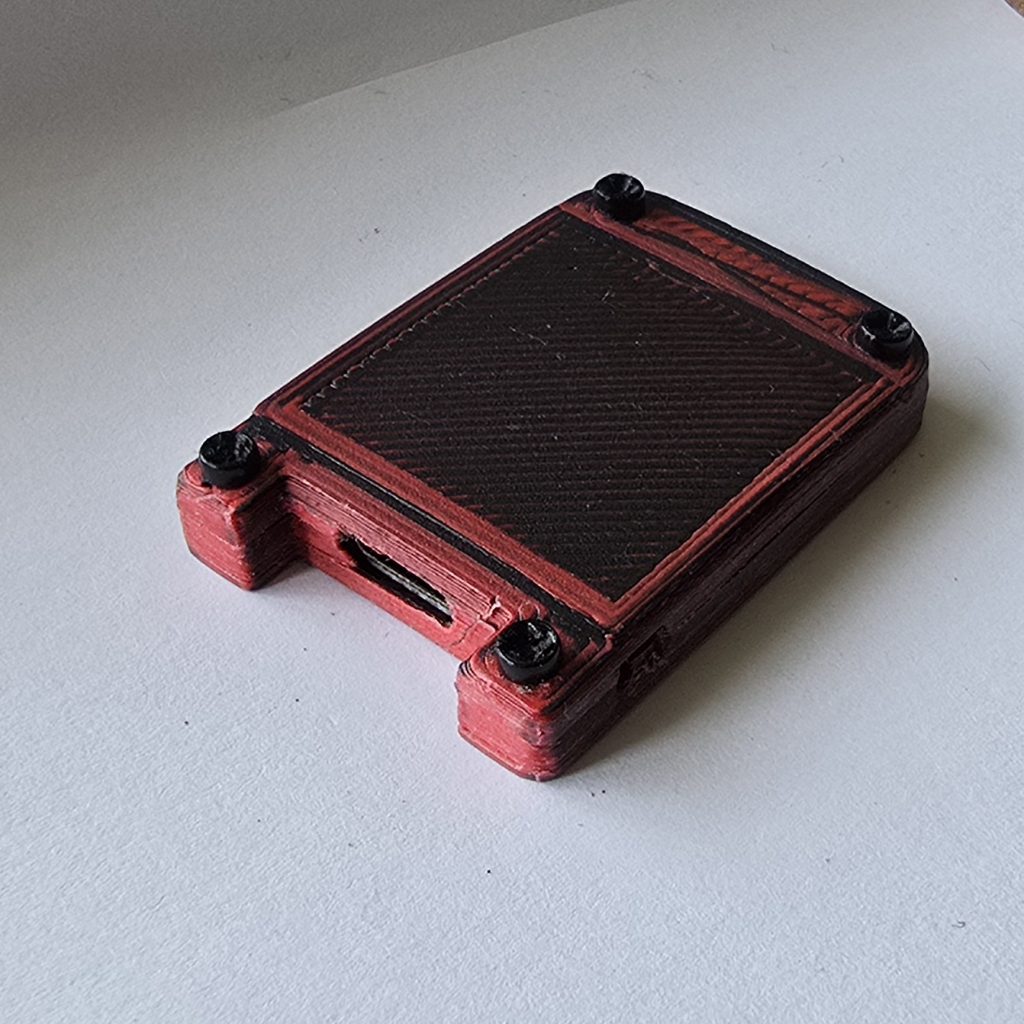
There are also connections on the ESP board to attach an SD card, and we can present that as a seperate USB mass storage device, allowing easy loading of malicious binaries / scripts onto the victim machine, or exfiltration of data from the machine to our SD card for retrieval later. It’s even possible to make these exfiltrated files accessible over the WiFi access point to download remotely.
Something which is also possible is to establish a remote shell connection through the devices WiFi, by using the USB serial function of the board or by another method using redirections we can forward the shell to a port on the AP or a web ui. This allows us to compromise a machine and get shell access even if the target machine is behind defences or even air gapped completely!