This is my travel router based on a raspberry pi 3b+. The idea behind it originally came while staying at a campsite with “free WiFi” – but which had a barely usable range unless you were stood directly underneath the wifi access points. This device gives us our own access point with a better range, it can also be used to connect to any public or private WiFi access point whilst keeping our devices on our own separate net, we can run all our traffic through a vpn, add ad blocking and malicious site blocking, parental controls, and much more.
- Skip to:
- Setting up basic OpenWRT rPi image
- Connecting and wireless setup
- Installing plugins- Travelmate
- Installing plugins – AdGuard
- Adding the mini OLED display
- Setting up Docker
I could have bought a device to do this, travel routers exist already and many of them run OpenWRT, but seeing as I had an old Pi 3 laying around and a USB WiFi adaptor with pretty good range that I’d bought when I was preparing for the OSWP exam, might as well build my own. The Pi’s built in WiFi will work fine as an access point and the stronger USB WiFi dongle will be used to connect to the Internet via WiFi hotspots.
Using a Pi for this has some advantages (and some disadvantages) over a dedicated router, we can have a lot more storage on board than a router usually has, plus we have the USBs if we want to expand and GPIOs which support I2C, SPI, even hdmi for displays, the built in camera connectors etc, we can run a VPN with openvpn or wireguard, add shared storage, run adblocking and parental controls, we can even install aircrack-ng to help get us access to private wifi APs (although I wouldn’t expect much in terms of psk cracking performance from a raspberry pi)
OpenWRT also provides packages to run docker including a plugin for the website to manage containers. With the extra storage we have available this opens up a huge array of software we can install and manage easily using docker containers.
The “PiFi” project already provides and image for setting up OpenWRT as a travel router on raspberry pi, however they only have builds for Pi 4 and up, and they provide their own USB adaptor. We don’t need to use that though, it turns out it’s pretty straightforward to do our own from scratch:
Preparing the SD card and setting up OpenWRT
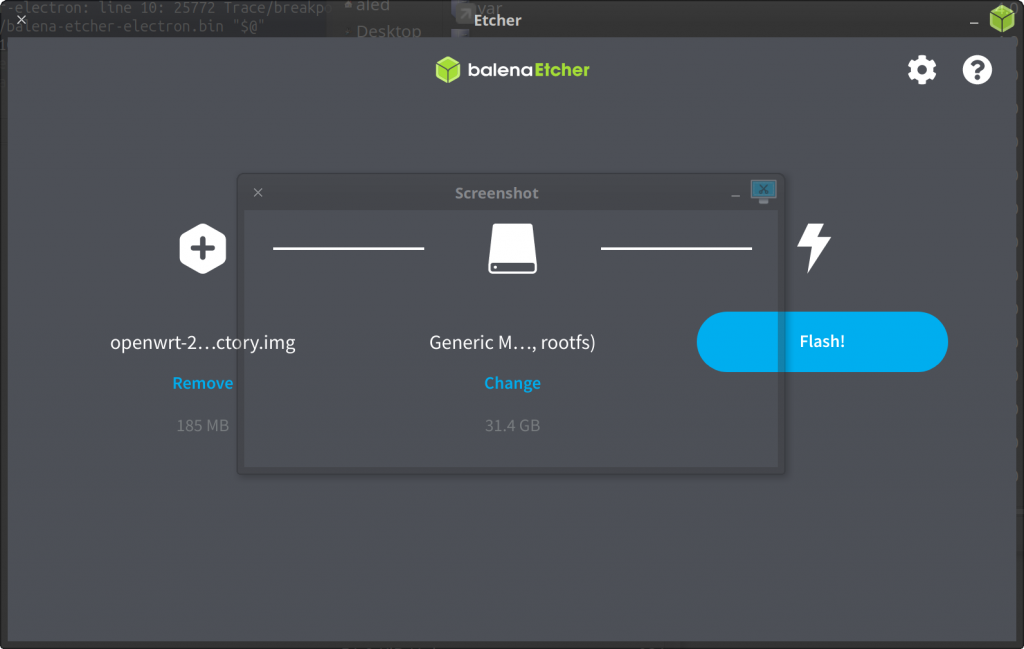
First we need to grab the right image for our device (rPi 3b+) from OpenWRT: all the images for the different Raspberry Pi models are provided here complete with info on installing.
Once we have the image we burn it onto an SD card with balena etcher (or use dd if you’re feeling brave)
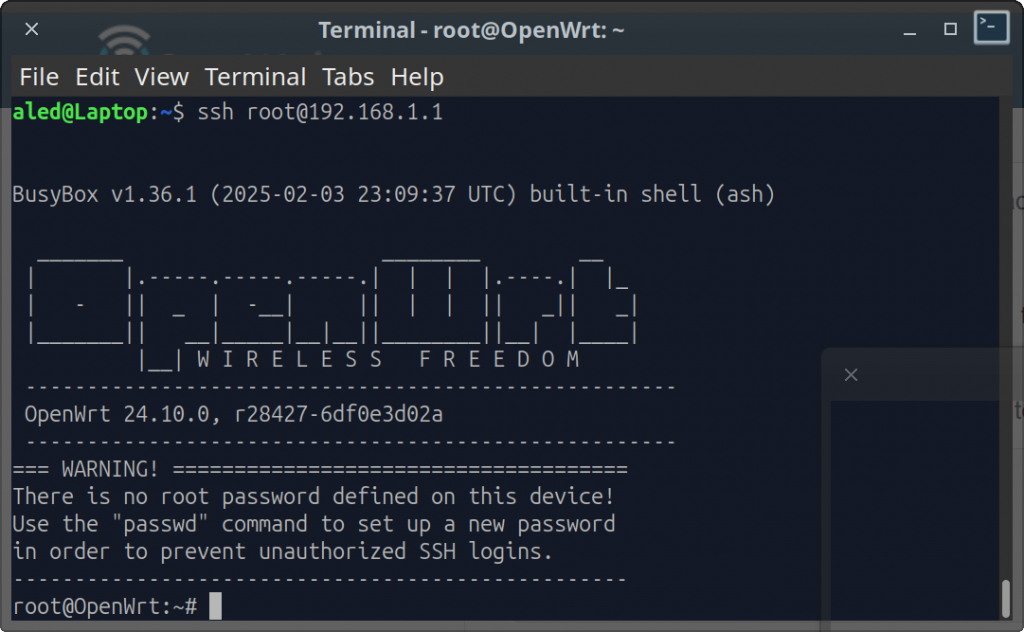
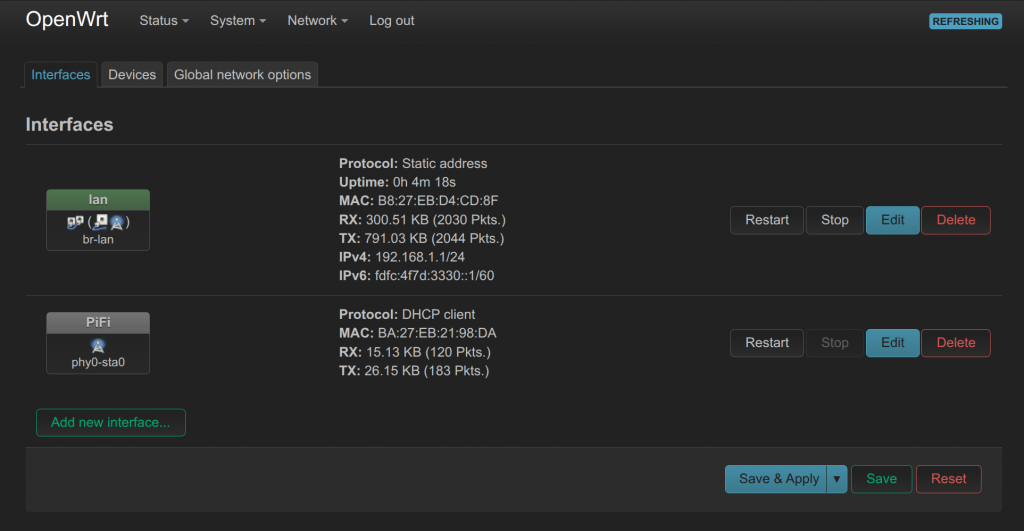
The default set up on first boot will be using the Pi’s built in ethernet on an IP address of 192.168.1.1, so the first task is to set it up with our own WiFi so it can download updates and plugins.
So first we connect by ethernet so we can ssh in (and change the root password with passwd).
We can continue the setup here via ssh, or browse to the built in web config interface “luci”.
Wireless setup
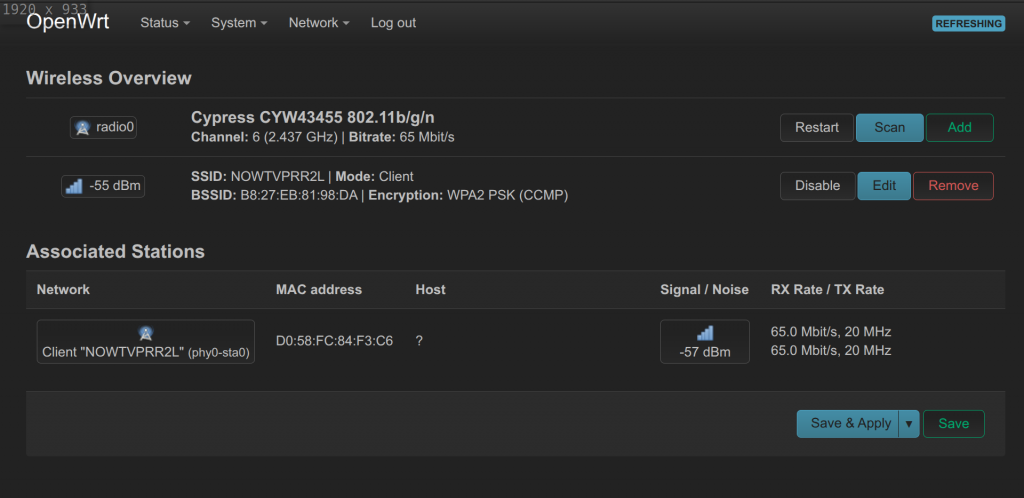
From here, under wireless settings the USB dongle is not recognised use the Pi’s WiFi to connect to the internet temporarily so we can set up the drivers for it.
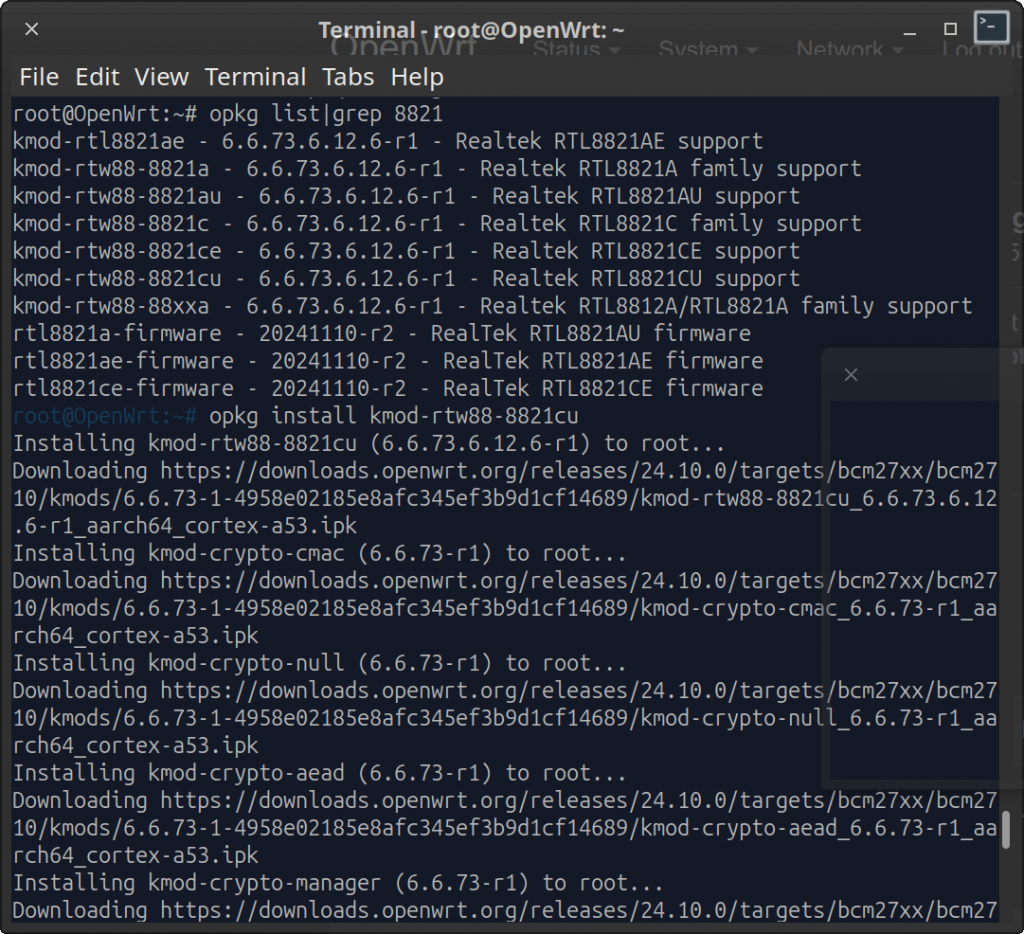
The manufacturer for my dongle does provide drivers for linux (one of the reasons I chose this specific dongle), and in recent kernels the drivers are included and it’s detected automatically but not in the case of this OpenWRT it seems.
The drivers can be downloaded from the manufacturer but will need compiling for ARM to run on the Pi, however I know the chipset used in the dongle is a realtek 8821cu and OpenWRT does seem to have a package for it which we can install with:
opkg install kmod-rtw88-8821cu
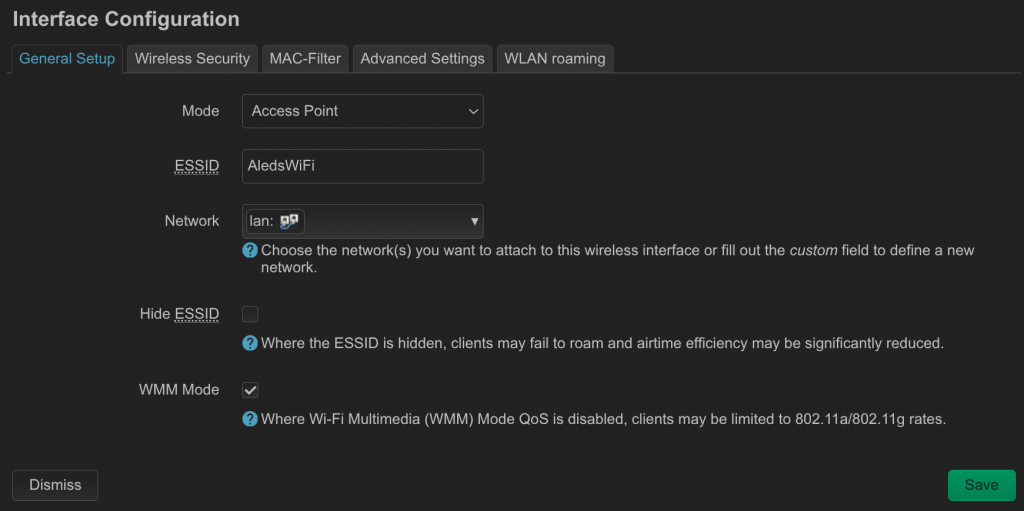
Now the dongle will show up in the devices page, we can set that up to use in client mode to connect to our home WiFi (set to the WWAN network), and set the Pi’s built in WiFi as an access point. The access point needs to attach to the “LAN” network and OpenWRT will handle DHCP and DNS for clients on the wifi, either with dnsmasq by default, or we can install adguard dns from the package manager and set it up for the LAN
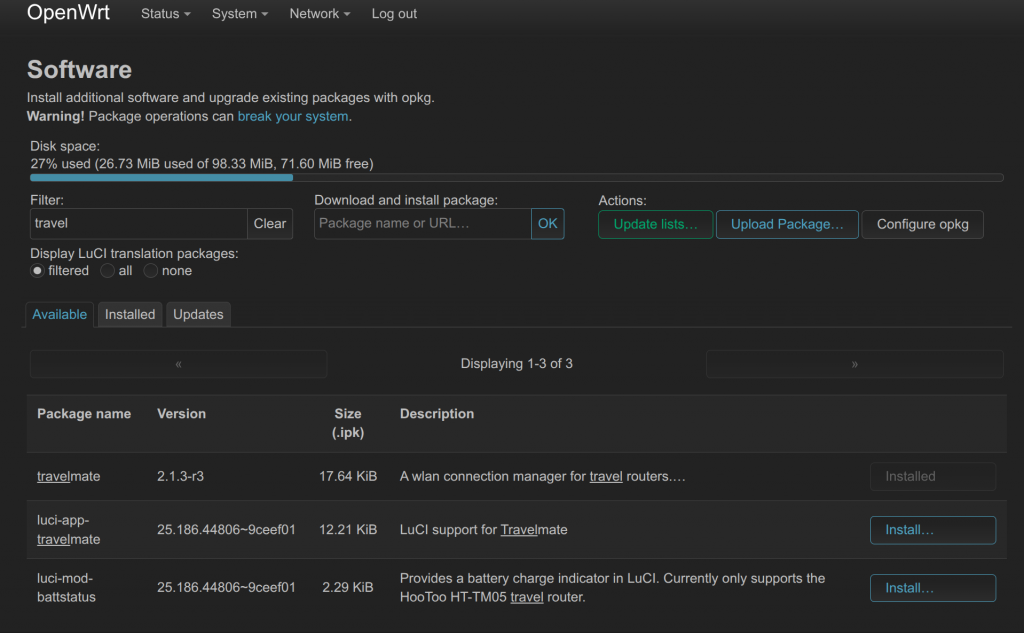
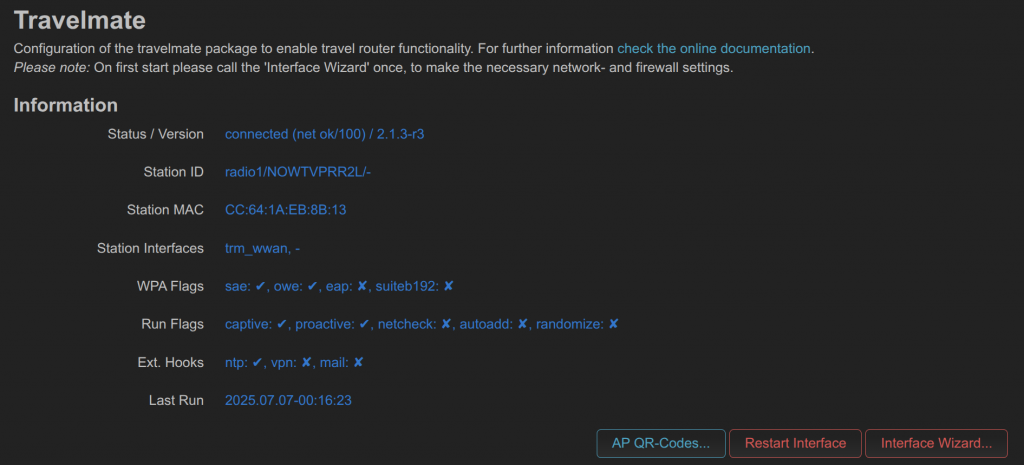
For the WAN connections, we can manage those ourself or we can use a package called travelmate , which is available to install from the web ui.
Travelmate helps automate connection to public wifi networks. It will save any networks we connect to and automatically connect to the best signal (it can even be configured to scan and save any open networks it sees).
There’s also options to automate logging in to captive portals via scripts, but travelmate should also recognise when we’re caught by a captive portal and add the needed exceptions to dnsmasq so it’s forwarded on to the first device we connect. Once one device has passed the captive portal, any other devices on our own WLAN will be able to access the internet as the portal only sees the MAC address of our USB dongle not the devices behind it.
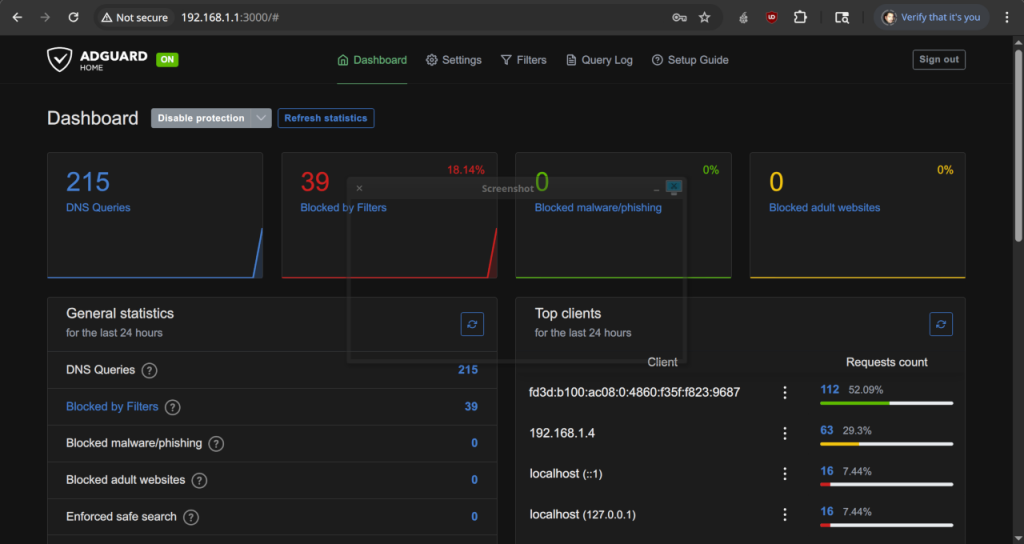
Adguard
To set up Adguard we can install the adguard-home package, either from the webUI or via the command line with:
opkg install adguardhomeservice adguardhome enableservice adguardhome start
The OpenWRT Wiki provides detailed instructions on setting up adguard here including a script which you can copy paste in to have adguard take over DNS duties from the default DNSmasq.
Once that’s set up you will be able to access adguards webUI, this is seperate from OpenWRT’s ‘luci’ webUI and will be on a different port number (by default it’s on port 3000).
If you dont want the full weight of running the full adguard-home installation, you can still set their dns servers in your dnsmasq config, giving you the option of secure dns over tls or https, and the option of blocking ads, malware, and adult content, at dns level.
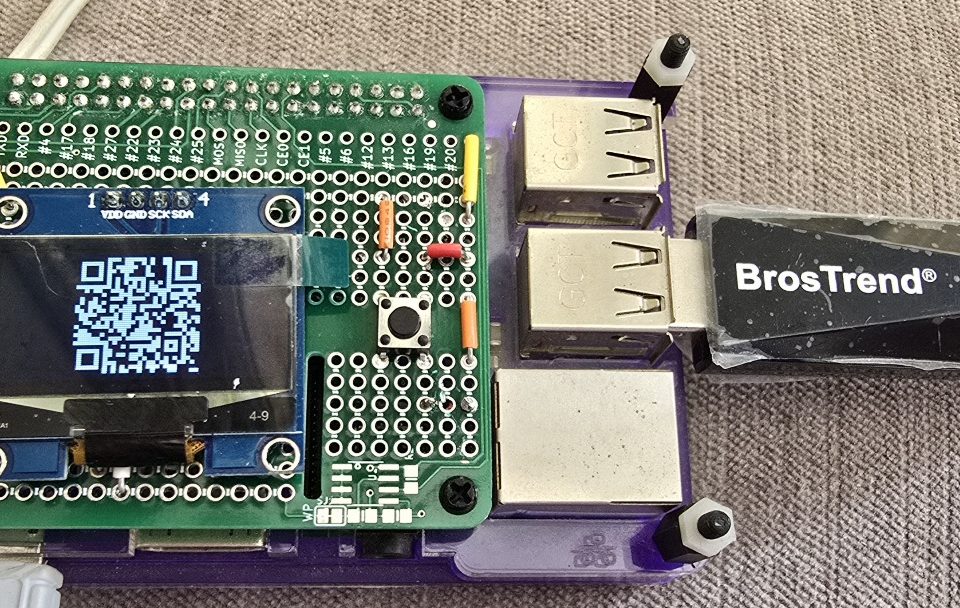
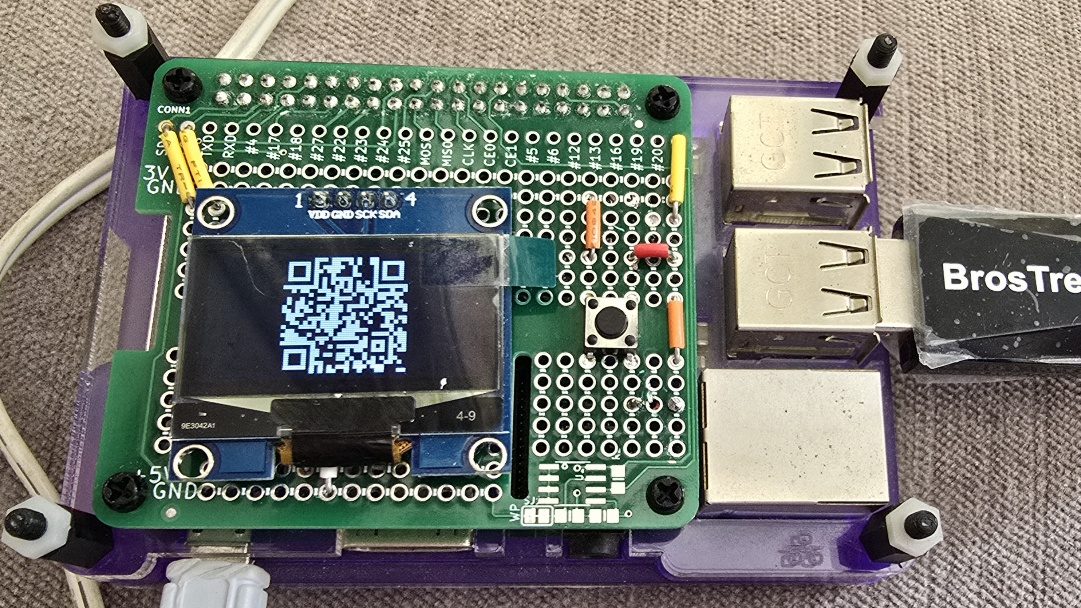
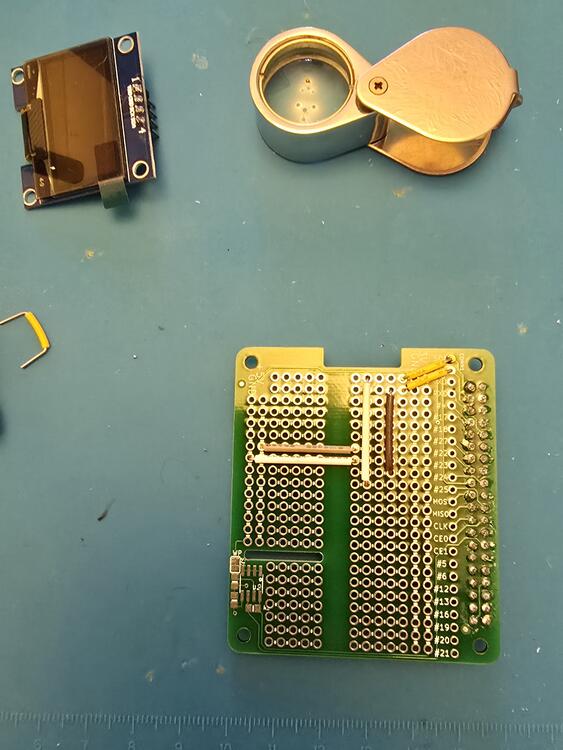
Adding an OLED display
I had a small i2c OLED screen left over from an old project, we can use it to display some useful stats like connection status etc. (you can also easily add LED status lights to a PI via the GPIO pins), we can also get it to show a qr-code for quick connection of new devices.
The screen is an SH1106 model, it’s quite easy to set up on a full raspbian install (the usual raspberry pi distro), but OpenWRT is trimmed down and based on a different kernel so some of the things you’d expect to just work, will not work, or need some fiddling. Thing like the WiringPi library, or the GPIO access through devicetree and filesystem do not work out of the box. I installed python (unlike running openwrt on router hardware, we have plenty of room to install things) and the luma oled libraries to interface with the screen (also pulls in a version of rpi.GPIO which works with openwrt as one of it’s dependencies).
Python we can install from the command line or from the software page in luci
Then we’re going to want to set up a venv to install luma and it’s dependecies:
python3 -m venv ~/luma-env
./luma-env/bin/python -m pip install --upgrade luma.oled
The screen connects to the standard i2c pins on the Pi, you can use any pins you want to with luma – but remember that i2c lines need pull-ups to 3.3v (the default i2c pins on the pi have these pull-ups already hardwired on the board).
I wrote a python script to show the connection status, system status, and a qr-code for connection to the access point. It runs on startup from rc.local (system->startup->local startup in the webUI).
We use a pushbutton to ground on GPIO pin 21 (with soft pull-up) to cycle between the pages, and to shutdown the pi when button is held for over 5 secs.
script here- https://github.com/aledthom/OLED-display-script-for-OpenWRT-rPi/blob/main/oled.py
Generate a wifi QR code for the access point and save it in ~/qr.png , and start the script in your venv (~/luma-venv/bin/python3)
Setting up Docker
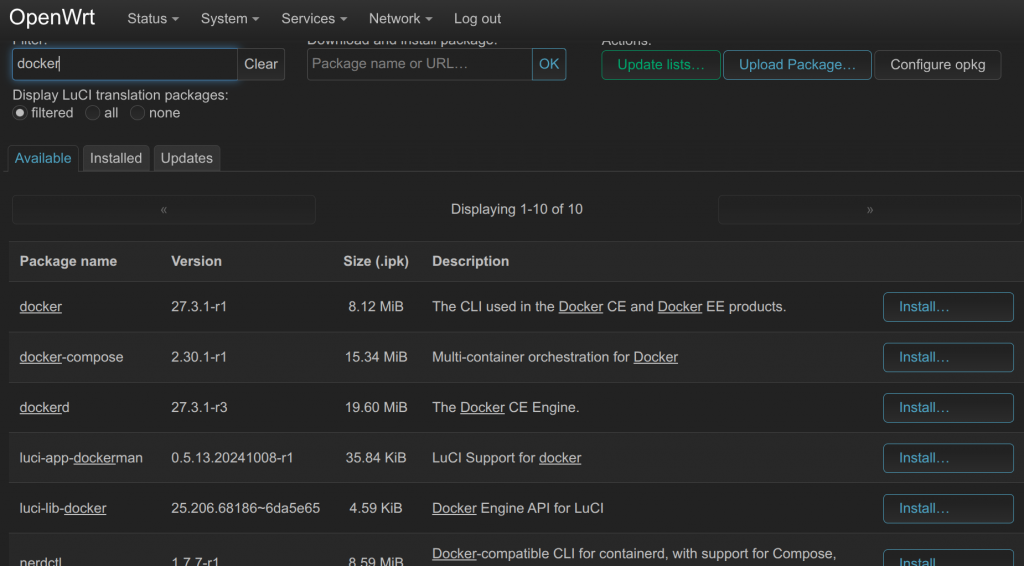
OpenWRT has packages for docker, and a plugin for the webUI to manage containers, installing luci-app-dockerman from the software page or with opkg from the command line will pull in docker, dockerd, and docker-compose as dependencies as well as the plugins needed for the web management page. There doesn’t seem to be much documentation on using the plugin, and what there is is mostly in chinese, but it’s quite intuitive – some docker experience will help but it’s not the nightmare that wrestling the docker whale from the command line can be.
There is a bug in the webUI page for docker management, which means after a reboot the menu will be missing entries. This seems to be caused by dockerd not being started before the plugin tries to connect to it, so it can be fixed by moving it earlier in the startup sequence before the uhttpd server, with:mv /etc/rc.d/S99dockerd /etc/rc.d/S45dockerd
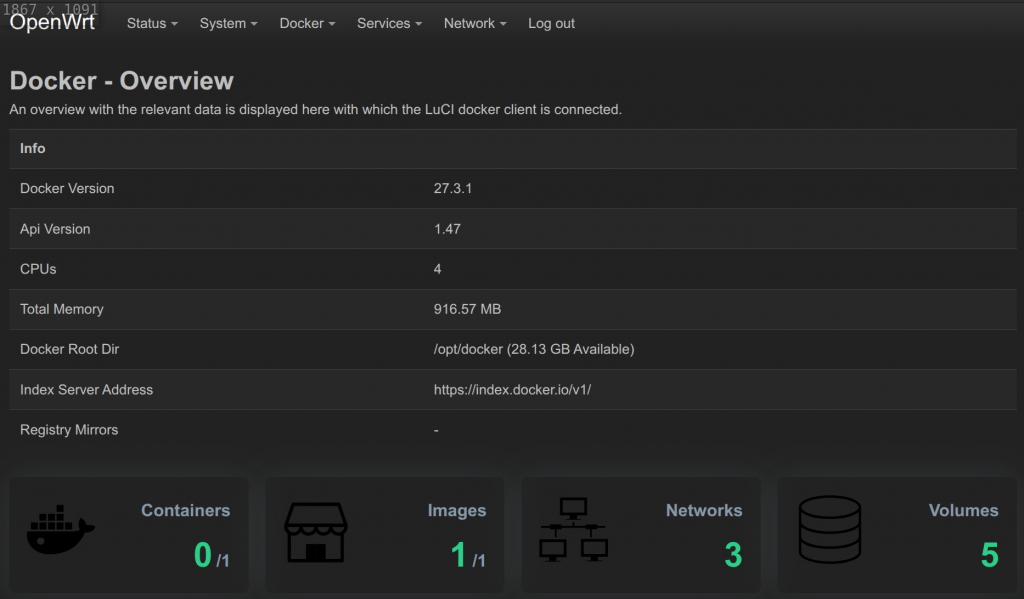
Once setup, adding images, managing containers and volumes can be done through this management page, it’s very intuitive. Of course you can also manage them from the command line as well if you hate yourself.
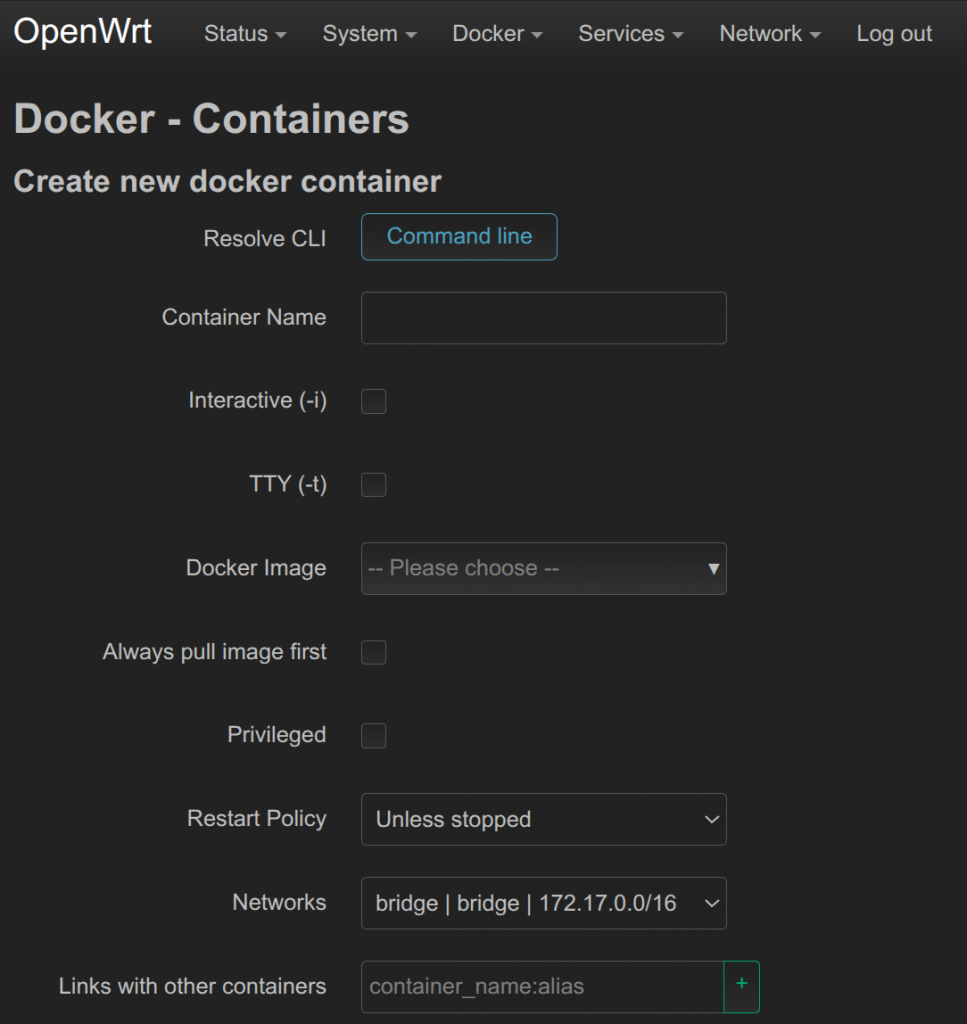
Containers can be added by copy-pasting in the docker run command line.
Images can be pulled/updated directly from the images page
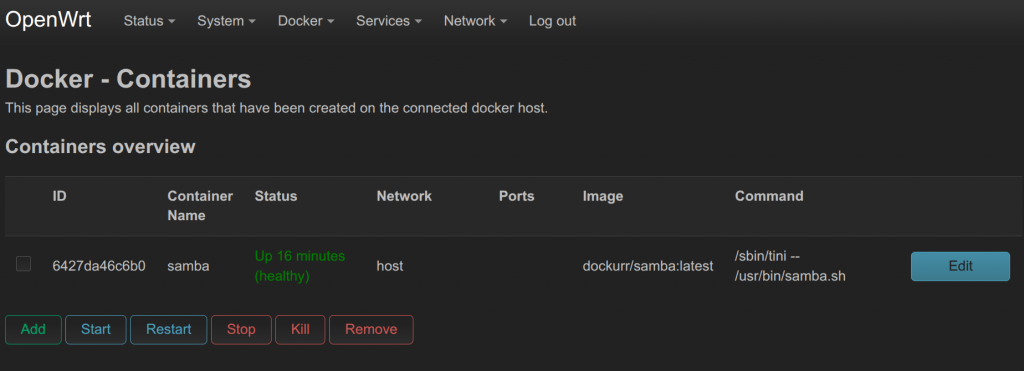
Running containers can be manipulated from the containers->edit page, you can view the status, logs, and connect to a running container and drop to a shell in a textbox right on the webUI page.
I still need to print a cover for the it so it looks finished, I’ll update this page once that’s done. Apart from that this project is finished and being used as you read this.